How to Clean a BBQ Grill Properly: Before, After and Deep Clean
Key Takeaways
- Routine grill cleaning removes residue to maintain food-contact surfaces, airflow, grease drainage, and ignition, not to make the grill look new.
- Deep cleaning requires a cool, shut-down grill, removing approved parts, clearing internal pathways, drying components, and reassembling correctly.
- Before cooking, inspect grates and confirm clear vents. After cooking, remove fresh residue. Deep clean when grease or ash blocks drainage, or ignition is inconsistent.
- A cleaning kit includes heat-resistant gloves, grate-compatible brushes, mild dish soap, and soft cloths. Avoid pressure washing, oven cleaner, and steel wool.
- Always follow the owner's manual for shutdown, part removal, and cleaning methods. Different materials like cast iron or porcelain need specific care.
- After brushing, inspect the cooking surface for bristles. The CDC documented injuries from detached bristles, so alternatives or wiping with a damp cloth are advised.
A clean grill is easier to inspect, maintain, and prepare for the next cookout. The goal is not to make every interior surface look factory-new after each meal. It is to remove residue and buildup that can affect food-contact surfaces, airflow, grease drainage, ignition, or normal operation.
The right method depends on the grill type, grate material, and buildup. Routine cleaning focuses on the grates, visible debris, and a grease-or-ash check. A deep clean adds removable internal parts and the grease or ash pathway. When this guide differs from the owner's manual, follow the manual for your exact grill.
What Is the Proper Way to Clean a BBQ Grill?
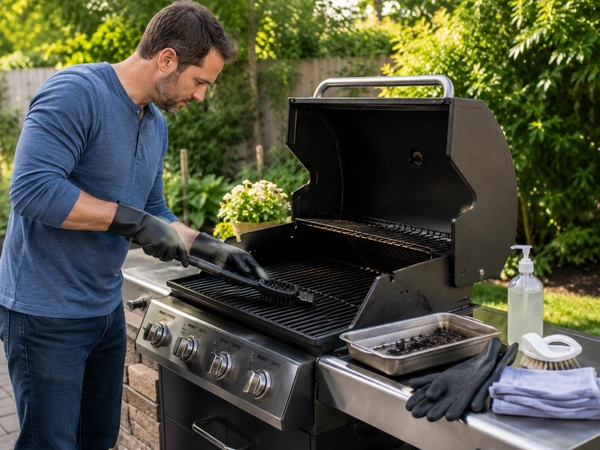
For routine care, remove loose residue from the grates, inspect the cooking surface, check the grease or ash system, and wipe accessible spills after the grill reaches the cleaning condition specified by its manufacturer. For a deep clean, fully shut down and cool the grill, remove only the parts the manual allows, clean each component with a material-compatible method, clear drainage or airflow paths, dry washed parts, and reassemble them in the correct order.
Do not use one cleaning method on every grill. Gas burners, charcoal ash systems, porcelain coatings, cast iron, stainless steel, infrared components, and electrical parts have different limits. A short warm-grate clean may be appropriate after cooking, while work below the grates normally requires a cool grill with fuel or power safely shut down.
What to Do Before, After, and Between Cookouts
Use the condition of the grill, not a rigid calendar alone, to choose the level of cleaning.
| When | Main tasks | What you are checking |
|---|---|---|
| Before cooking | Inspect the grate, remove anything left behind, check the grease or ash system, and confirm vents and drainage are clear | Foreign debris, loose bristles, overflowing grease, blocked airflow, or visible damage |
| After cooking | Follow the model's approved warm-cleaning process, remove fresh grate residue, and address accessible spills once safe | Residue that will harden if left in place |
| Every few uses | Look below the grates and inspect heat shields, the lid interior, grease tray, firebox, bowl, or ash catcher | Hidden buildup that routine grate cleaning does not remove |
| During a periodic deep clean | Cool and shut down the grill, remove approved parts, clean the internal pathway, dry components, and reassemble | Grease drainage, burner condition, airflow, corrosion, pests, and damaged parts |
| Before long storage or after a long idle period | Deep clean, dry, inspect, and check moving or fuel-related components as directed | Moisture, corrosion, nests, stale grease, blocked ports, and deteriorated parts |
Deep cleaning is useful when grease no longer drains, ash restricts vents, ignition becomes inconsistent, buildup prevents inspection, or the grill has been stored for a long period. Frequency varies with design, use, food, and storage conditions.
What You Need Before Cleaning
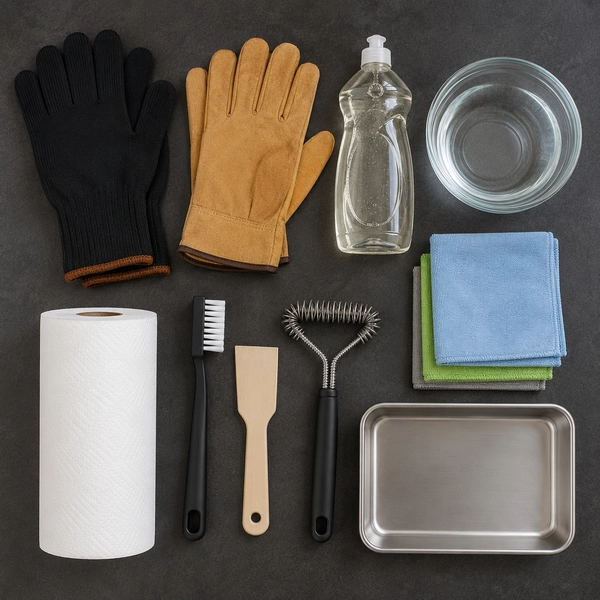
A practical kit may include heat-resistant gloves for manufacturer-approved warm grate care, work gloves for a cool deep clean, a grate-compatible brush or scraper, a nylon detail brush, a plastic or wood scraper, mild dish soap, warm water, soft cloths, paper towels, and a suitable container for grease or fully cooled ash.
Match every tool and cleaner to the surface. A method that works on bare stainless steel may scratch paint, chip porcelain, damage an infrared emitter, or remove seasoning from cast iron. Avoid pressure washing, oven cleaner, steel wool, sharp improvised tools, and strong chemicals unless the owner's manual explicitly permits them.
Keep grill-cleaning tools separate from utensils and platters used for food. USDA grilling guidance recommends using clean utensils and surfaces and keeping items that touched raw meat separate from cooked food. That food-handling step belongs in the final cookout check.
Step 1: Shut Down the Grill Safely
Routine grate cleaning and deep cleaning happen under different conditions. Some manufacturers recommend preheating or a short post-cook burn-off to loosen residue. When your manual calls for that process, follow the stated heat level, lid position, and timing, then use a long-handled compatible tool. Do not improvise a prolonged high-heat cycle.
For tasks that require removing parts, reaching below the grates, handling grease, or working near burners, let the grill cool completely. Turn all controls off and close the fuel supply. Disconnect a gas cylinder only when the manual or cleaning task requires it. Never brush, probe, or remove a burner while the grill is operating.
With a charcoal grill, close or adjust the vents as directed and allow the coals to extinguish naturally. Do not empty the bowl or ash catcher while heat or live embers may remain. Pellet, electric, infrared, kamado, and flat-top appliances can add power, controller, fire-pot, stone, or surface-seasoning considerations, so use their exact shutdown and cleaning procedures rather than extending gas or charcoal instructions to them.
Step 2: Clean the Cooking Grates
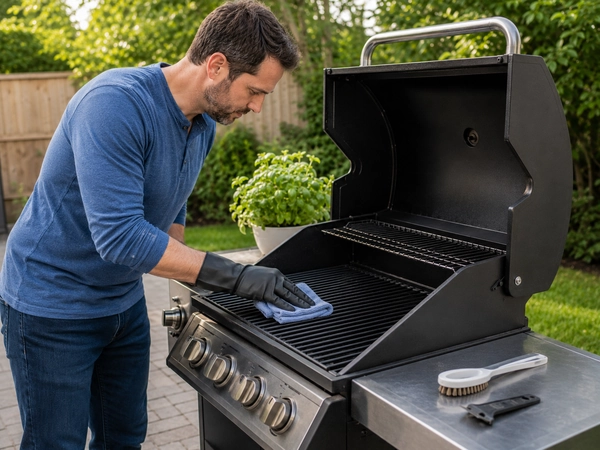
Remove loose food residue with a tool approved for the grate. Work along and around the bars without pressing so hard that the finish chips or the cleaning tool sheds material. When cool grates need a wet clean, use warm water, mild soap, and a non-damaging scrubber only if the manufacturer permits washing.
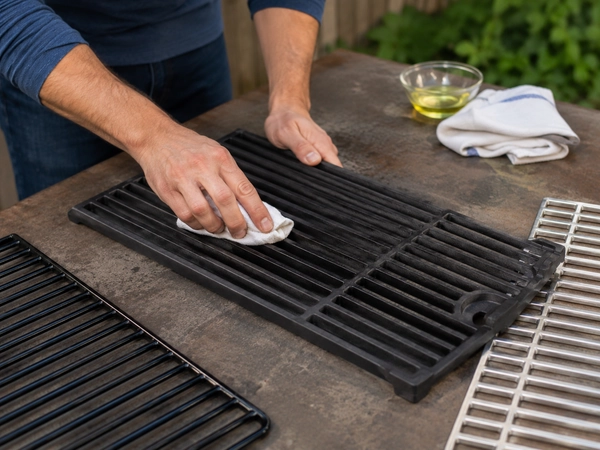
Rinse away soap residue and dry the grates completely before reinstalling them. Cast iron may need a light protective oil coat or reseasoning after a wet clean. Porcelain-coated grates need gentler handling because aggressive scraping or impact can damage the coating. Stainless steel is durable, but unsuitable abrasives can still scratch it.
Before applying oil, confirm that the surface and manufacturer call for it. Never direct aerosol oil toward an open flame or hot burner. When oil is appropriate, apply a thin, controlled layer to a cool grate with an oil-dampened towel.
Step 3: Inspect for Bristles and Other Debris
When using a wire grill brush, inspect it before each use and replace it when bristles are bent, loose, missing, or heavily trapped with debris. After brushing, inspect the entire cooking surface and wipe it with a damp cloth or another manufacturer-approved method before food reaches the grate.
The CDC report on wire grill-brush bristle injuries documented cases in which detached bristles became embedded in food and were swallowed. The report advises careful examination of the grill surface and notes that alternative cleaning methods may be considered. It does not establish that every wire brush will fail, but it supports treating brush condition and the final grate inspection as important steps.
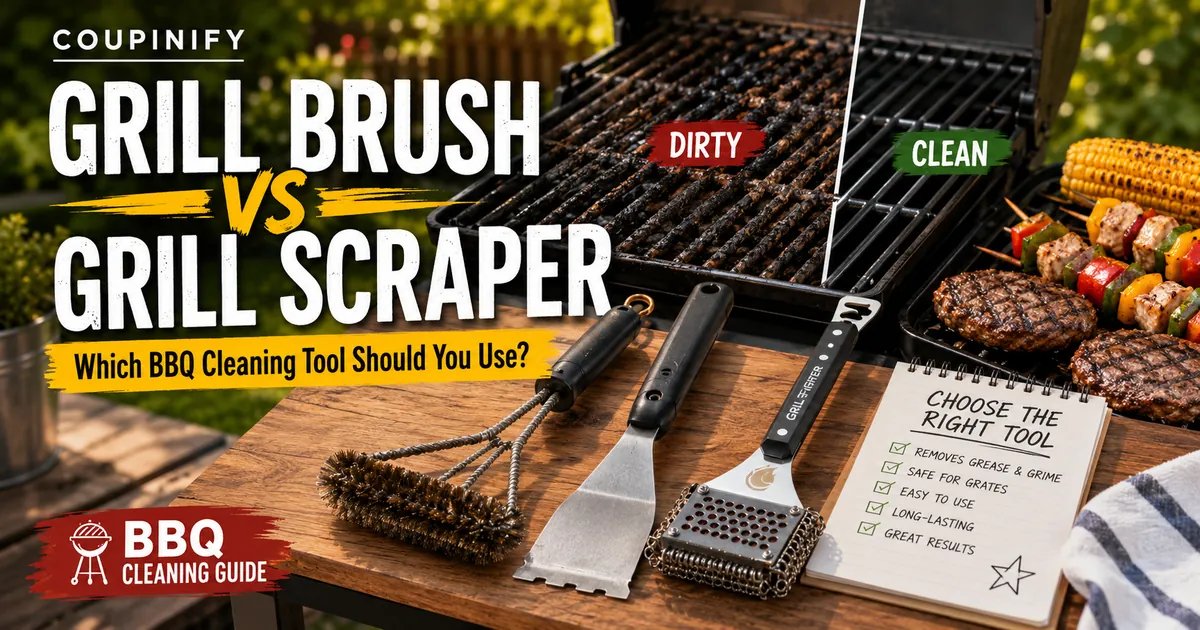
Bristle-free coils, scrapers, pads, wood paddles, chainmail tools, and nylon brushes are alternatives, not universal answers. Choose by grate material, surface shape, residue, and the grill manufacturer's guidance. For a detailed tool decision, read Coupinify's grill brush versus grill scraper guide. This article stays focused on the cleaning process rather than repeating that full comparison.
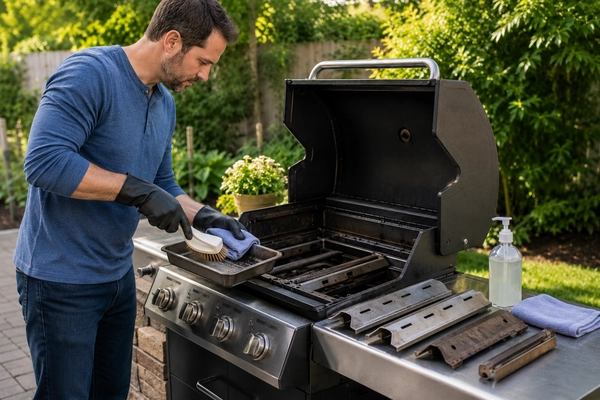
Step 4: Clean Heat Shields and Similar Parts
Gas grills may place heat tents, flavorizer bars, emitter plates, or deflectors above the burners. These parts collect drippings and carbonized residue while helping distribute heat. Once the grill is cool, remove them only in the sequence shown in the manual, then brush or scrape away loose deposits with a compatible tool.
Do not assume every internal component should be soaked. Porcelain-coated, infrared, or specially finished parts may require dry brushing or a specific cleaner. If a shield is burned through, heavily warped, cracked, or shedding its finish, cleaning will not restore it. Record the model number and use a compatible replacement.
Step 5: Clear Gas Burners Without Damaging Them
Burner cleaning is maintenance, not an opportunity to enlarge ports or reshape metal. With the fuel off and the grill cool, remove the grates and heat shields. Follow the manual for access or removal. Some burners can be brushed in place, while others use clips, screws, crossover tubes, or ignition parts that must be handled in a specific sequence.
Brush loose debris from the burner exterior and ports in the direction recommended by the manufacturer. Weber maintenance guidance, for example, tells owners of relevant gas models to brush across burner ports rather than down the length of the tube. Treat that as a model-family example, not a replacement for your own grill manual.
When the manual permits it, a narrow cleaning rod or bottle brush may help clear the inside of a burner tube. Do not force a large object into an opening, use pins or drill bits, or enlarge a port. Inspect for corrosion, splits, blocked air inlets, insect nests, and damaged ignition components.
Reinstall each burner exactly as designed. When a gas connection has been disturbed, complete the manufacturer's leak-test and flame-check procedure before cooking. Stop using the grill and arrange service when you smell gas, see damaged fuel components, cannot produce a normal flame pattern, or cannot complete the required test safely.
Step 6: Empty and Clean the Grease System
A grill's grease-management system may include a sloped channel, removable tray, catch cup, disposable pan, or foil liner designed by the manufacturer. Let the grill cool, remove the container carefully, and dispose of grease according to local waste guidance. Do not pour cooking grease into a household drain.
Scrape thick buildup into the trash, then wash removable parts with warm soapy water when their materials permit it. Wipe the channel that directs grease toward the tray and confirm it is not blocked. Replace disposable liners before they overflow, and do not add improvised foil if it can interfere with drainage, airflow, or the original design.
Heavy grease buildup can contribute to flare-ups and makes inspection more difficult. A clean cooking grate does not compensate for an overflowing tray or a blocked path below the cookbox. Check the system more often after cooking especially fatty foods.
Step 7: Remove Ash From a Charcoal Grill
Wait until the coals and ash are completely cold. Sweep ash into the catcher or remove it from the bowl with the grill's built-in system. Clear the lower vents because accumulated ash can restrict airflow and make temperature control less predictable.
The U.S. Fire Administration's ash-disposal guidance advises allowing ashes to cool, placing them in a tightly covered metal container, keeping that container at least 10 feet from the home and other buildings, and never emptying ashes directly into a trash can. Follow local fire and waste rules as well.
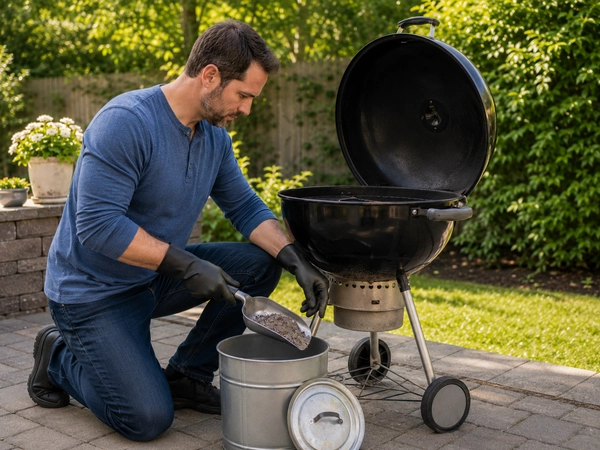
Do not dump warm ash into a plastic bin, paper bag, compost container, or pile near a structure. Do not pour water into a hot grill simply to speed cooling unless the manufacturer specifically directs that method. Hidden embers can remain hot, and sudden cooling can damage some finishes.
Once the bowl is empty, remove hardened deposits with a non-damaging tool and confirm the dampers or vents move normally.
Step 8: Clean the Lid, Firebox, Bowl, and Exterior
Dark flakes on the inside of a lid are often carbonized grease and smoke deposits rather than paint, although actual coating damage needs separate inspection. With the grill cool, loosen flaky buildup using a plastic scraper or approved brush, then remove the debris.
Clean the firebox or charcoal bowl only as aggressively as needed to restore normal drainage and airflow. Stable discoloration is different from loose carbon, pooled grease, or thick debris. Do not scrape through a protective finish simply to make the interior look new.
Use a cleaner suitable for the exterior material, whether painted steel, porcelain enamel, stainless steel, or powder coating. Wipe brushed stainless steel in the grain direction and dry it to reduce spotting. Keep water and cleaner away from control panels, igniters, electrical connections, thermometers, and gas fittings.
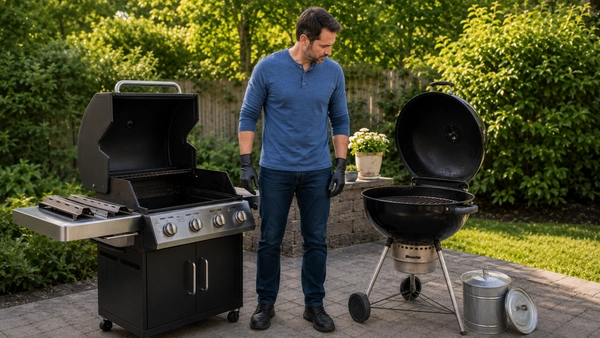
Gas Grill vs. Charcoal Grill Cleaning
| Area | Gas grill | Charcoal grill |
|---|---|---|
| Shutdown | Controls off, fuel supply closed, disconnect only as instructed | Vents managed as instructed, coals fully extinguished, grill cool |
| Main hidden buildup | Grease channel, heat shields, burner ports | Ash bowl, lower vents, ash catcher |
| Airflow concern | Blocked burner ports or air inlets | Ash restricting dampers or vents |
| Deep-clean priority | Grease management and normal burner condition | Cold ash removal and clear airflow |
| Final check | Burners seated correctly; leak and flame checks when required | Ash catcher, charcoal grate, and vents move normally |
Both types need clean food-contact surfaces before cooking. Gas grills require attention to grease and burner condition; charcoal grills depend on cold ash removal and clear vents.
Before moving from one grill type or model to another, recheck the owner's manual instead of assuming the same shutdown, removal, washing, or reassembly steps still apply.
How Cleaning Changes by Grate Material
Stainless Steel Grates
Stainless steel tolerates regular brushing when the tool is suitable, but harsh abrasives can scratch it. Remove residue, wash only when needed, rinse, and dry. Heat discoloration alone does not mean the grate is dirty or damaged.
Cast-Iron Grates
Cast iron needs moisture control. Remove residue, avoid unnecessary soaking, dry promptly, and restore a thin protective oil layer when the manufacturer recommends seasoning. Deep rust, cracks, or heavy flaking may need restoration or replacement rather than routine cleaning.
Porcelain-Coated Grates
Protect the coating. Use a tool approved for porcelain surfaces, avoid striking the grate, and do not chip at residue with a sharp metal edge. If the coating is damaged, moisture may reach the metal below it and corrosion can develop.
When to Clean, Replace, or Arrange Service
Plan a deep clean when grease no longer drains normally, smoke appears in an unusual place, flames become uneven, ignition is inconsistent, ash blocks airflow, residue flakes from the lid, pests or nests are present, or the grill has been stored for a long period.
Cleaning cannot repair every fault. Replace or service parts that are perforated, severely corroded, cracked, warped, shedding coating, or no longer seated correctly. Stop using the grill when fuel, electrical, or structural components appear damaged.
Use this decision rule:
- Clean now when residue, grease, or fully cold ash is blocking normal maintenance areas.
- Follow the manual when removing internal parts, cleaning burners, testing gas connections, or treating specialty surfaces.
- Replace a part when its material or coating has failed.
- Arrange service when the issue involves fuel, ignition, electrical components, or structural damage.
- Do not continue when the grill cannot be shut down, reassembled, or tested as its manufacturer requires.
Common Grill-Cleaning Mistakes
- Cleaning too aggressively: Excessive force can chip coatings, deform burner ports, or scratch finished surfaces.
- Starting a deep clean too early: Internal parts, grease, and ash should be handled only after the grill is fully cool and safely shut down.
- Ignoring the grease path: A clean-looking grate does not prevent trouble from an overflowing tray or blocked channel.
- Leaving washed parts damp: Trapped moisture can promote corrosion, especially on cast iron or enclosed components.
- Using one tool everywhere: Grates, burners, painted panels, and porcelain parts do not have the same tolerance.
- Skipping the final surface inspection: Bristles, scraper fragments, cloth fibers, and cleaner residue should not remain on a food-contact surface.
- Reassembling from memory: Burners, shields, trays, and catch systems need to return to the positions shown in the manual.
What to Avoid
Avoid shortcuts that use uncontrolled flames, caustic chemicals, pressure washers, plastic tools near heat, or sharp objects in burner ports. Do not cover drainage areas with improvised foil, spray cooking oil toward heat, or cool charcoal in a way the manufacturer prohibits.
Do not treat a high-heat burn as the entire cleaning process. Heat may loosen or carbonize residue, but it does not empty a grease tray, remove cold ash, inspect a burner, find a loose brush bristle, or dry a washed component.
Verify grate compatibility and current product details instead of assuming one cleaning tool suits every grill. Readers looking for current offers can check Coupinify's GrillFighter coupons and deals page, then review the merchant's current product details and their grill manual before choosing a tool.
Final Grill-Cleaning Checklist
- Read the cleaning section of the owner's manual.
- Confirm the grill is in the correct warm or fully cool condition for the task.
- Shut down fuel or power before removing internal components.
- Use tools and cleaners approved for the grate and surface.
- Inspect for loose wire bristles or other foreign material.
- Clear grease channels, trays, or catch cups before they overflow.
- Remove charcoal ash only after it is completely cold.
- Keep burner openings, vents, and drainage paths clear.
- Rinse away soap or cleaner where washing is permitted.
- Dry every washed part before reassembly.
- Replace damaged or heavily corroded components.
- Complete the manufacturer's required checks when a fuel system was disturbed.
Browse the Grills category for relevant grill and maintenance options, or step back to Home and Garden for broader household equipment. When the next task is planning the full gathering rather than cleaning the grill, use the summer backyard cooking checklist.
Frequently Asked Questions
Should You Clean a Grill Before or After Cooking?
Do both at different levels. After cooking, remove fresh residue using the grill's approved warm-cleaning process. Before the next cookout, inspect the grate, remove anything left behind, and confirm the grease, ash, and airflow systems are ready.
Can You Wash Grill Grates With Soap and Water?
Often, but only when the grate material and manufacturer allow it. Use mild soap, rinse thoroughly, and dry immediately. Cast iron may need oiling or reseasoning, while specialty coatings or emitters may require another method.
Is It Safe to Use a Wire Grill Brush?
A wire brush requires careful inspection. Replace one with loose, bent, or missing bristles, then inspect and wipe the grate after use. The CDC has documented injuries from detached bristles in food, so a compatible bristle-free method may be preferable for some readers and grate types.
How Often Should You Empty a Grill's Grease Tray?
Check it every few uses and after cooking especially fatty foods. Empty it before grease approaches the tray's capacity or blocks the drainage path. The exact frequency depends on the grill design and what you cook.
How Often Should a Charcoal Grill Be Emptied?
Remove accumulated ash before it restricts airflow. Check the bowl and ash catcher before use, but empty them only after the coals are fully extinguished and the grill is completely cool.
Can You Hose Down the Inside of a Grill?
Do not hose down a grill unless its manufacturer explicitly permits it. Water can enter burners, igniters, electrical parts, insulation, seams, or gas components, and hidden moisture may promote corrosion.
Why Is the Inside of My Grill Lid Flaking?
Loose dark flakes are often carbonized grease and smoke deposits. Remove them from a cool lid with an approved scraper or brush. If the actual coating is lifting, cracking, or exposing metal, consult the manual and manufacturer about repair or replacement.
Keep the Routine Simple
Proper grill cleaning is a maintenance routine, not one aggressive scrub. Keep food-contact surfaces clear, inspect for foreign debris, manage grease or ash, protect the grate material, and reserve internal work for a fully cool, safely shut-down grill.
Use the owner's manual as the final authority for the model. A useful cleaning session should leave the grill easier to inspect and operate, not damaged by unsuitable tools, excessive force, or shortcuts that create a new problem.